

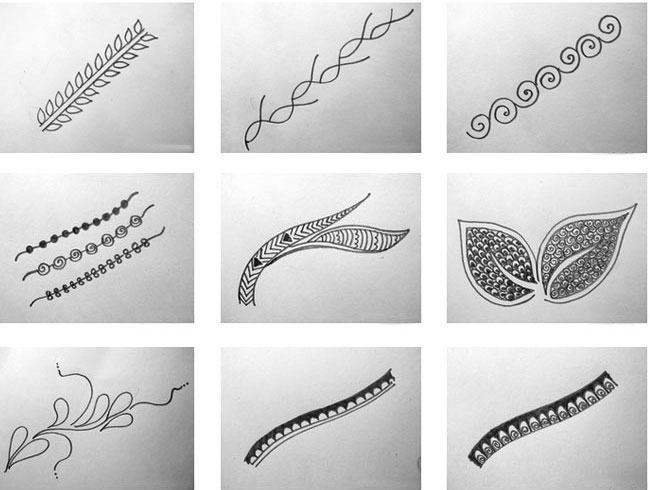
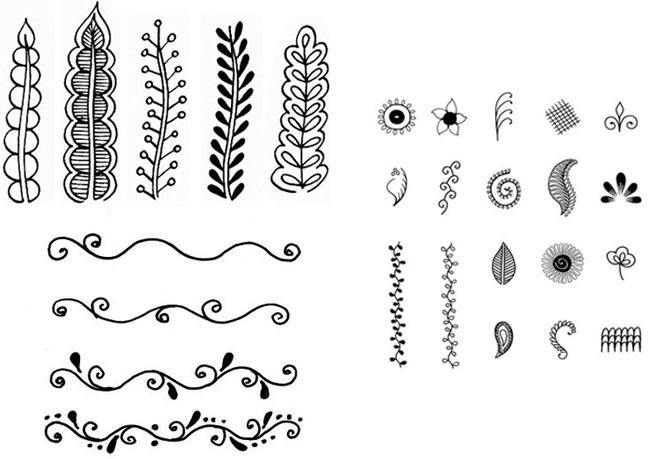
Whether it’s a simple curved branch with leaves, bud designs or the gota patterns, you should remember these easy designs. While it takes time to obtain a fair hand in intricate designs, you can always start with the simple henna or mehndi patterns and with practice later on you can go for intricate Arabic henna designs.
Source: letscreatecrafts.com
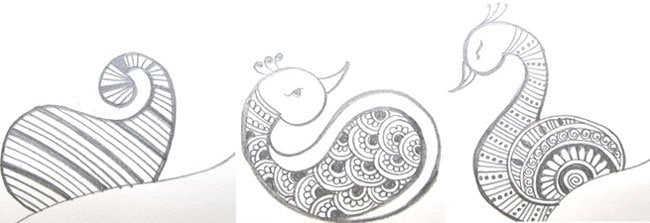
How to draw peacock design using mehndi
After you have practiced the leaf and vine designs, now you should start working on the peacock design, which is essential in the art of henna. Follow this peacock henna step by step tutorial to learn how to do henna.Peacocks are one of the most beautiful henna designs which add elegance and charm to the body art. Go through these image tutorials to easily learn how to draw the outlines and also the elaborate patterns within.
With basic henna designs mentioned earlier in the post, you can fill in the body of the peacock. However, always make sure to carefully draw peacock’s eye and beak to create natural effect. For fingers, you can either go for checkered designs, floral patterns or simple vines. You can make bigger or smaller peacock designs with mehndi.
Fill it up according to your wish. You can make small flowers or add checks to fill the peacock.
Source: letscreatecrafts.com

Some tips to follow:
- In order to check if your skin is allergic to your skin, you can apply a small amount on your hand before starting with the step by step henna design
- If you’ve done waxing on your hands, then wait for a day or two before applying henna. As pores are opened and the chemicals present in henna might enter through open pores
- The color of the henna is different on palm and on skin. While it is darkest on palm, it appears to be lighter on hands. It only get darker after one or two days


.gif)


No comments:
Post a Comment